Publisher Management
You can reach your list of publishers from the "Publishers" menu item inside the primary navigation.
From here you will see a tabulated list of publishers and a "New Publisher" button.
Creating a new publisher is as simple as clicking the "New Publisher" button and entering a valid domain name and clicking "Create". There are options to add an optional label to help you identify publishers quickly as well as bulk upload for speedy onboarding.
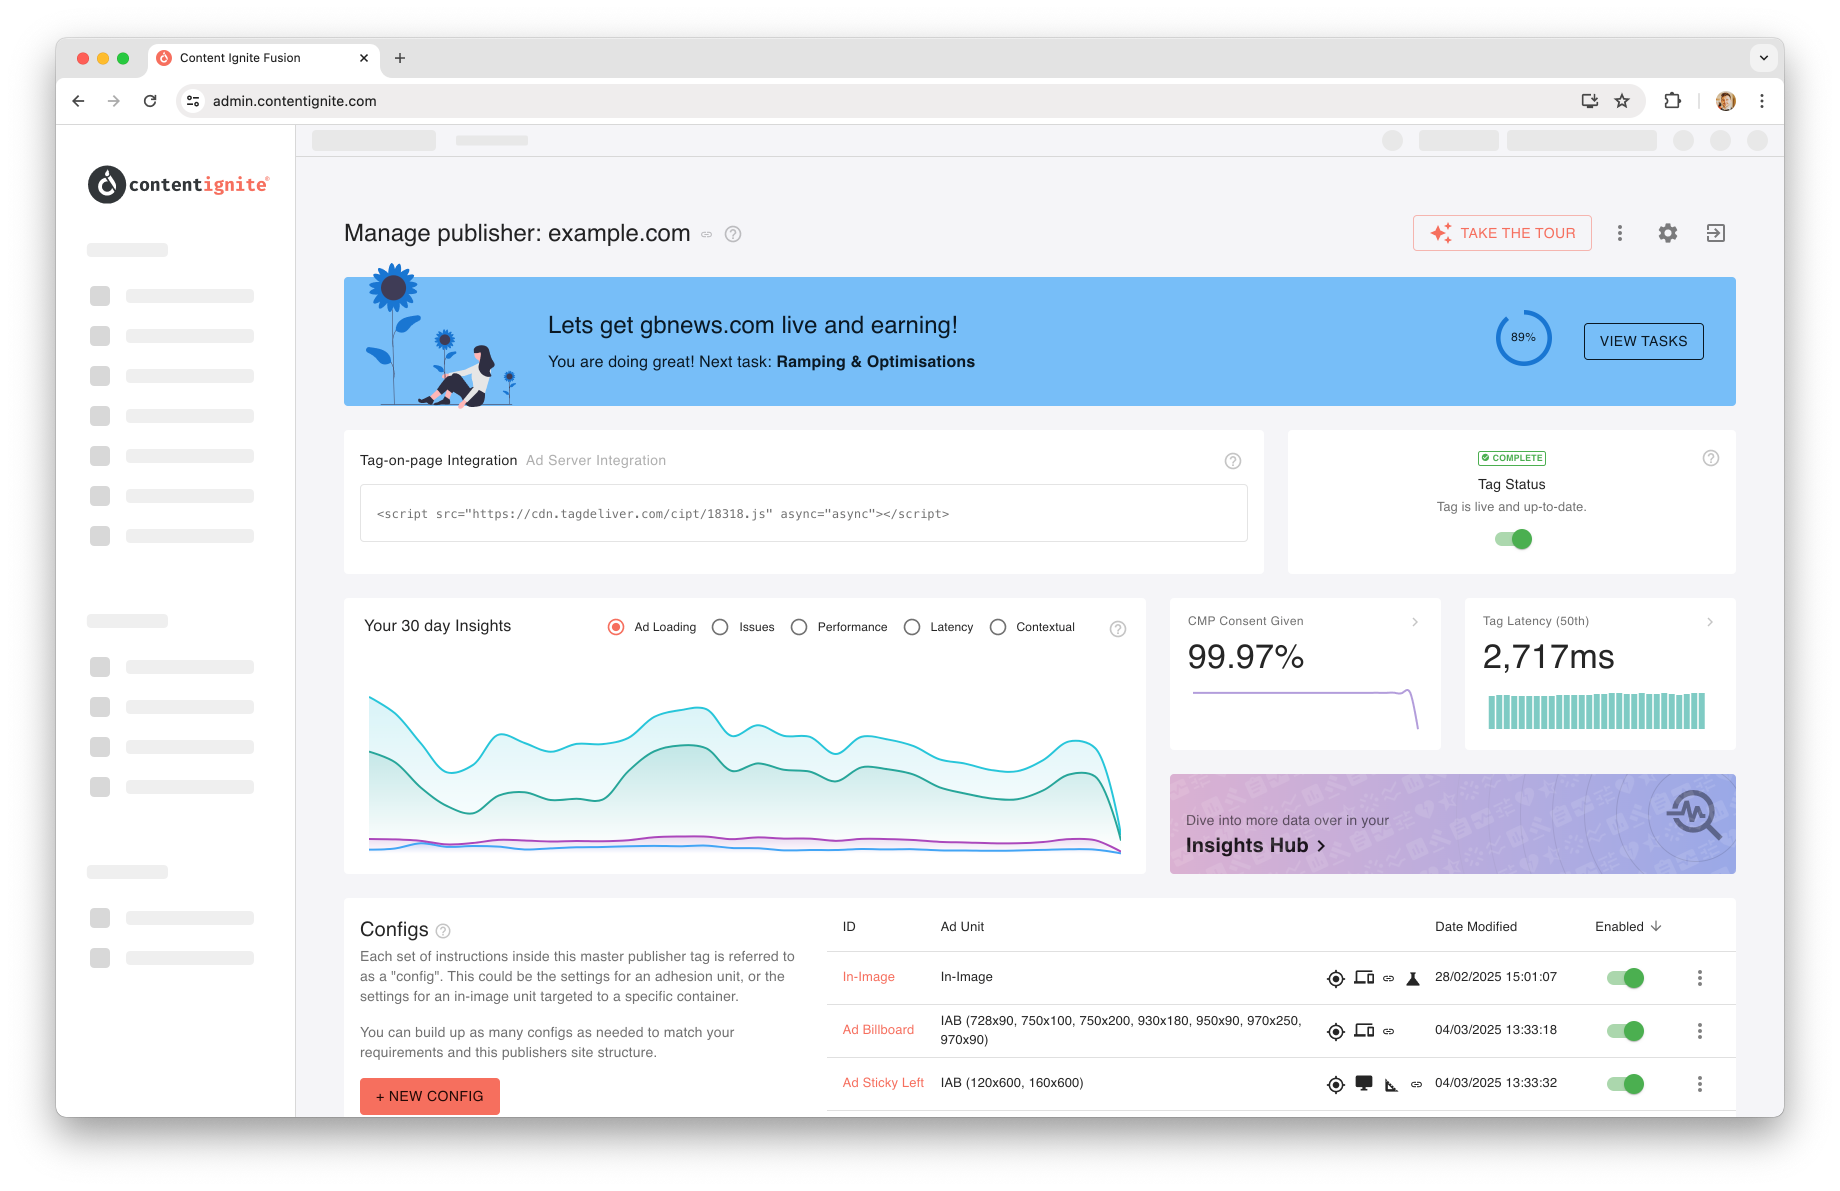
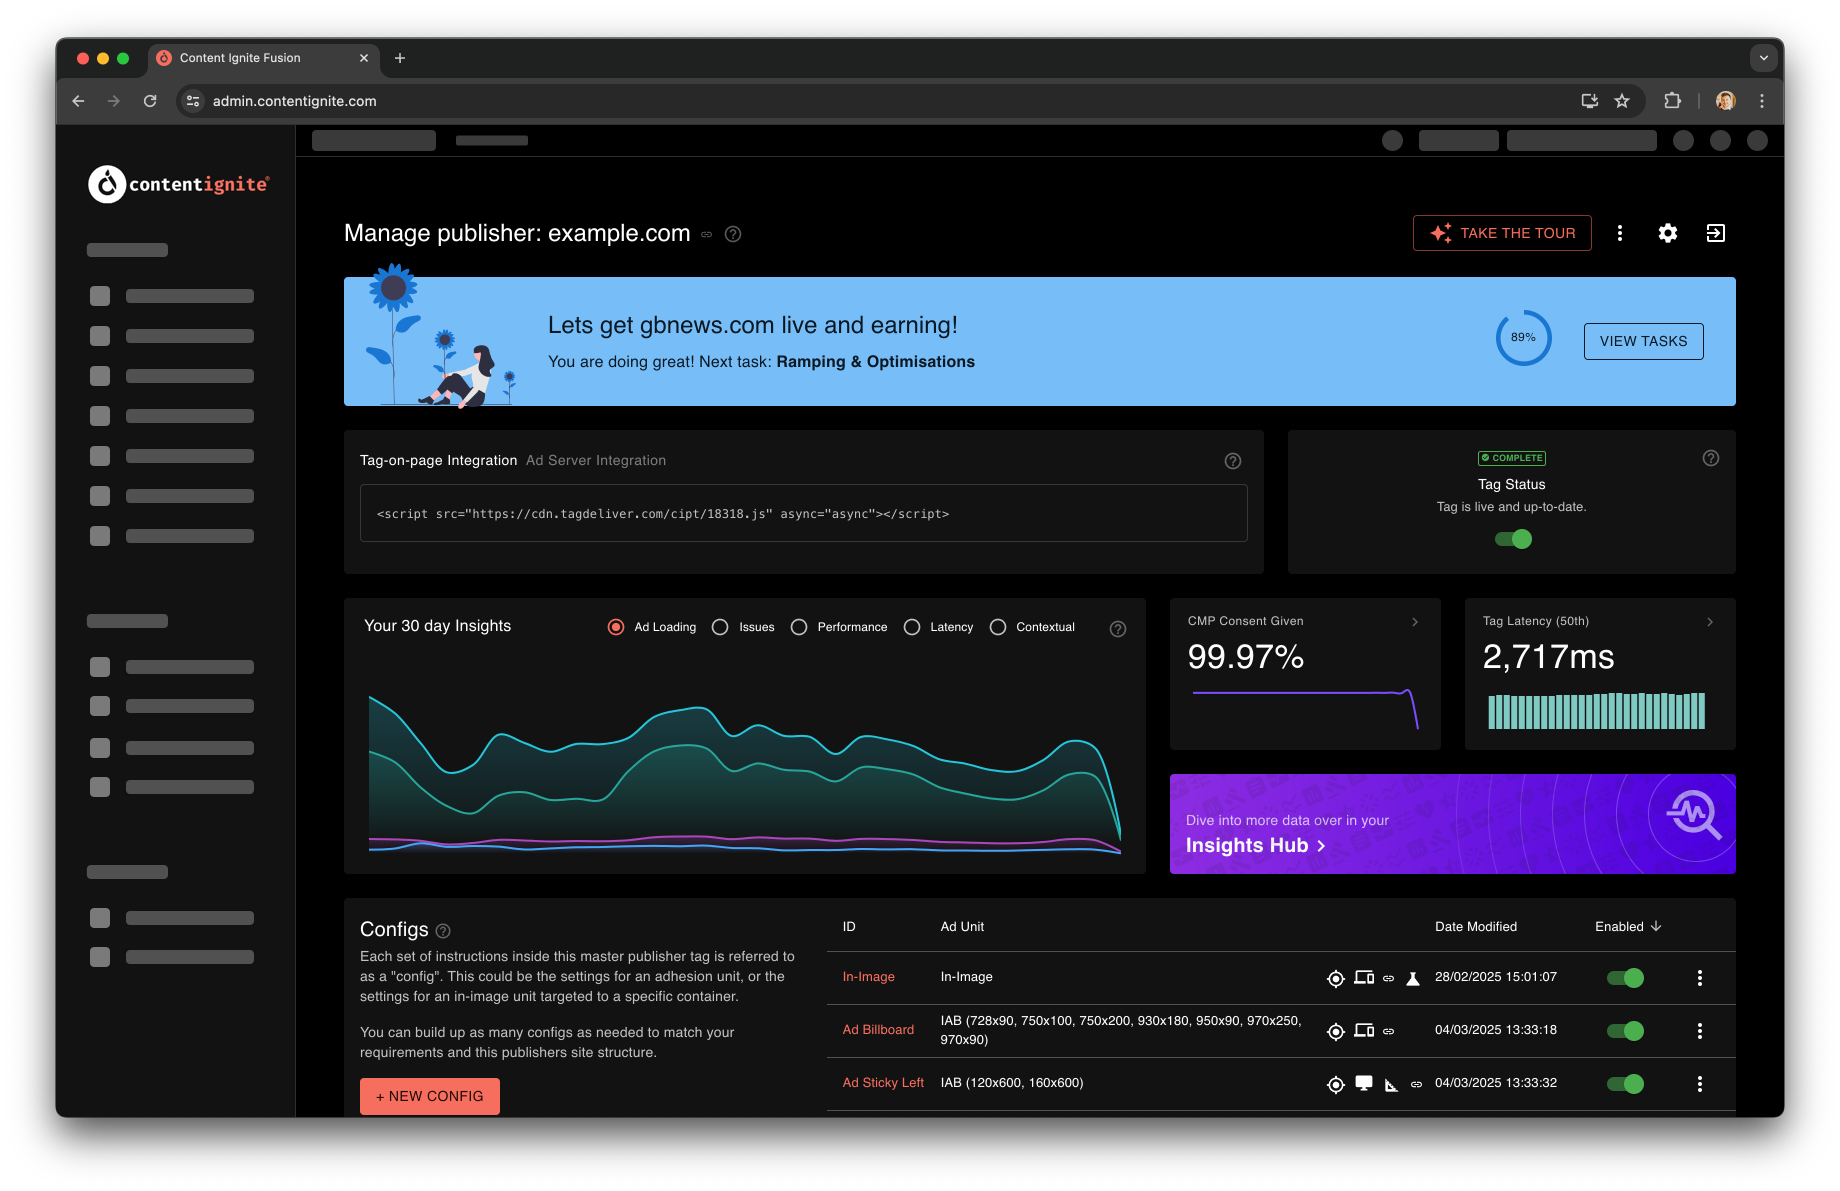
From here, or from clicking on an existing publisher, you will be taken to the main management page for an individual publisher.
Publisher Onboarding
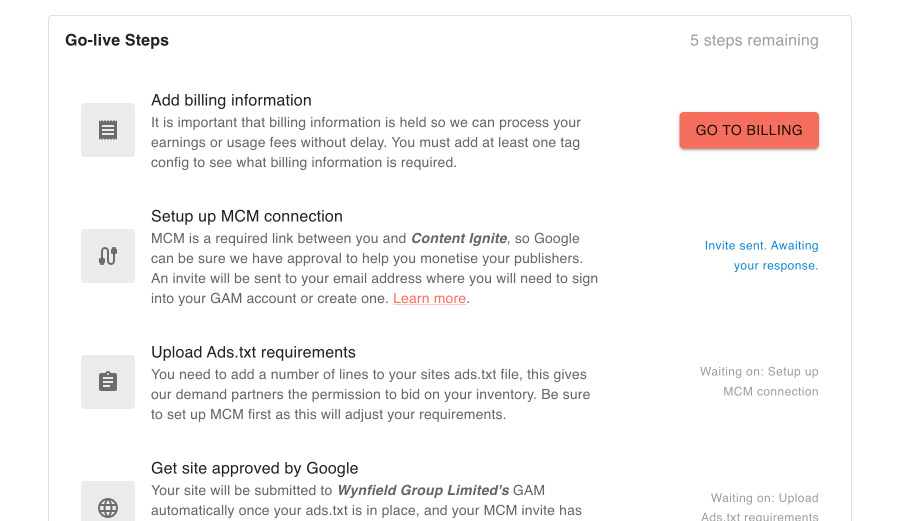
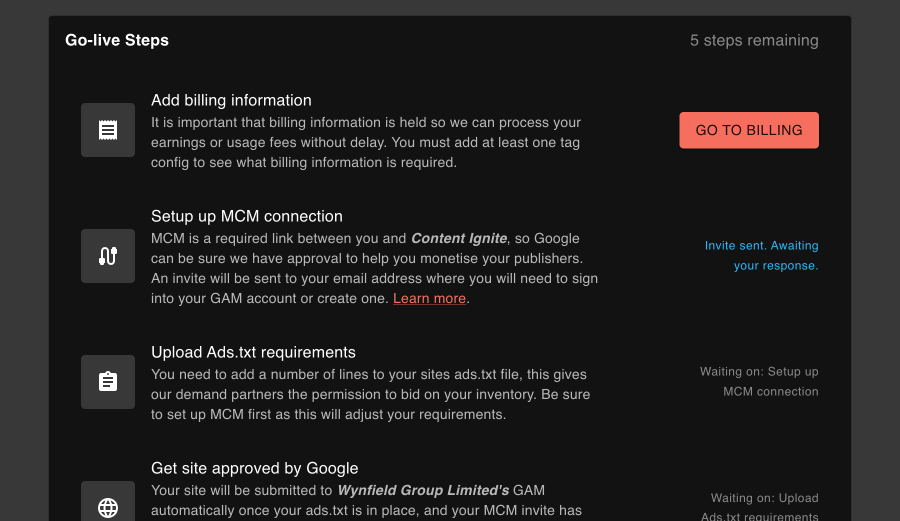
For all new publishers, there are several steps that need to be completed before you can go live with your publisher tag. These steps will be shown at the top of the page with details on how to complete each step. Once these are all complete, you can enable the publisher tag and start monetising your site!
The vital steps to complete are:
Upload Ads.txt requirements
Adding the required entries to your publisher's Ads.txt is vital to successful ad serving. Your Ads.txt grants us access to serve ads to your site, so without this, advertisers assume we do not have your consent. Click the View requirements button to see the lines that need to be present, then upload them to your site Ads.txt file.
You will find a contentignite.com line for each parent organisation. These lines form part of the Supply Chain Object (SCO), part of the ad industries bid transparency specification and required by many partners. It is therefore vital for protecting from revenue loss that these lines are in place.
Our systems check Ads.txt files every hour.
Add billing information
If you are a SaaS customer, aka someone just using our technology, then we need to be able to charge you for your usage each month. The same goes for the usage of our contextual technology.
If you are using Content Ignite demand, then we need your bank details so we can pay you your hard-earned revenue!
So we make sure these details are on file before going live, to avoid any delays or interruptions to service later down the line.
For more information on billing/payments, see our billing help page.
Setup up MCM connection
When using our ad server, Google must approve each organisation and publisher to ensure they meet their policy requirements, this is an automated process and we will inform you of any issues in this process via email. Approval typically takes one business day but can take up to two weeks.
There is nothing additional required from you for this step.
Get site approved by Google
Every publisher needs their domain approved by Google for monetization. No actions are needed here and approval typical happens within a day (but can take up to two weeks). Googles decision is outside of our control but we will notify you of any status changes as they happen.
Get approved
Internal verification ensures your organisation and publisher meet our quality standards. Verification is automated and you will get an instant decision upon initial set up of a new publisher.
If you are rejected at this stage, you will be given a single opportunity to appeal the outcome, where a member of our team will then review your case and make a decision typically within 3 working days.
Set up your first tag config
Before you can go live, make sure you have at least one config in place. A config is a group of settings describing a single ad unit type and its targeting specific to its parent publisher.
For more information on tag configs, see our Tag Configs help page.
Accept our terms
Our platform terms need to be accepted before you go live. Your account manager will reach out regarding this and once signed, will be marked as completed here in platform.
Go live!
The only thing left to do at this stage is to integrate the publisher tag into your site. See our section on Tag Deployment for more information.
Tag Status


The tag status block contains a toggle allowing you to turn your publisher tag on or off as required. This will be disabled if any of the onboarding steps are still outstanding. It will also display information if there are any tag issues, such as out-of-date code, or missing active tag configs.
Above the tag status, you will also notice the build status. Any changes to your tag that would require we push an update (config changes, publisher setting changes etc) will be queued up to be re-built and deployed live (takes place with 5 minutes of change). These statuses are for your information only and require no input from you. Until the status reads "Complete" you can assume any changes you have made will not be live and in-effect yet.
The status flow is as follows:
Update queued- The tag update is in the queue waiting to be processed by our systems.Update in progress- Our systems are re-building your tag at this very momentPurge pending- The tag has been updated, but we need to clear the cache for it to showPurge in progress- The cache purge is in progressComplete- The tag has been fully rebuilt and the cache has been cleared. You should see your latest changes in effect.
There is also a sixth status, of Deploy frozen, for when a deployment freeze has been set up against the publisher.
Publisher Insights


From quick dashboard overviews to detailed Insight Hub pages, the Publisher Management platform offers a wealth of performance and health data for publishers to dive into.
Monitor a quick collection of graphical and statistical data over a 30-day rolling period, all accessible from the Publisher Management Dashboard. Toggle between various graphs to view different aspects of publisher health, with hoverable daily breakdowns.
You can also navigate to the Insights Hub dashboard to uncover in-depth data on various health and performance aspects of your publisher setup.
Tag Configs
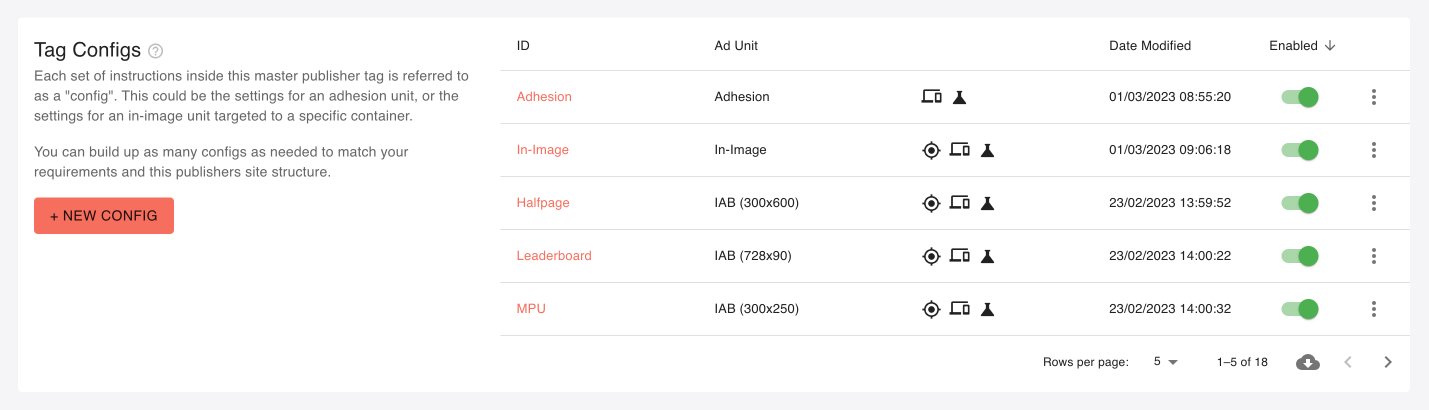
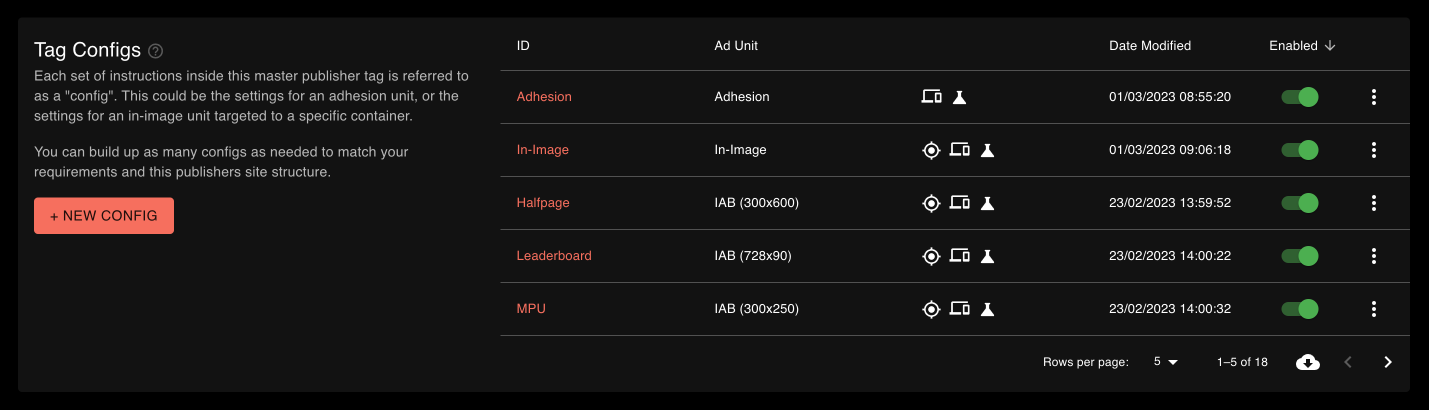
The last block on the page contains a list of all your tag configs, these instruct the publisher tag on what units to load, where to place them and what features to enable. More information can be found on the Tag configs help page.
Publisher Actions Menu
Clicking the three vertical dots in the top right of a publisher page will open up a publisher actions menu. From here you can manage various publisher-specific settings.
Tag instruction emails
If you are managing a none O&O publisher that you have not given dashboard access to, you can use this feature to send them instructions on tag integration and Ads.txt requirements.
The email will open up in your email client, allowing you to review the content before sending it.
Live demo
Click this option and enter a full URL to a page on your publisher site, and we will generate a page that includes the publisher tag and all its configs. Great as a first step before go-live, to get an idea of what units work best with a publisher, or to simply help you sell a non-O&O publisher on the product.
Ads.txt requirements
Click this to bring up the Ads.txt requirements if you ever need to reference them. These can change from time to time, however, any issues will be highlighted in your organisation's Diagnostics report.
Managed Ads.txt


We understand that managing your ads.txt file can be a bit of a hassle, especially when ensuring a smooth supply chain and avoiding common pitfalls. That’s why we offer a Fusion-managed ads.txt file for each publisher — fully set up and ready to go, with no ongoing maintenance required.
You can find a link to the hosted version of your file in any of the Ads.txt requirements modals. This link can then be pointed to from your domain setup.
Working with other third-party partners?
No problem. In our Third-party Requirements Settings section, any valid third-party ads.txt lines you enter will be automatically tracked and added to your hosted file.
Setting up a domain redirect
Each setup may vary and could require some development resources, but once it’s done, you shouldn’t need to manage it further. Here are some typical high-level methods for setting up redirects to the hosted ads.txt file:
Apache (using .htaccess file)
There are several ways to set up redirects in an Apache environment, such as server or domain-level configuration files. To keep things simple, we’ll show you how to do it at the individual domain level using an .htaccess file.
- Access your web server where your website is hosted via FTP, SSH or a file manager.
- Locate or create the
.htaccessfile in the root directory of your website. This is usually in thepublic_htmlfolder. -
Open the file using your preferred text editor, or via terminal/SSH using something like the
nanoeditor, and add an Apache redirect line. For example:Redirect permanent /ads.txt https://cdn.tagdeliver.com/ciat/{your_pub_id}/ads.txt -
Save the changes, then restart Apache. You can do this with a command like:
sudo systemctl restart apache2
Nginx (using return directive)
There are two main ways to implement redirects in Nginx: return and rewrite. Since this is just a simple file redirect, we’ll demonstrate the easier return method.
- Locate and edit (or create) the Nginx configuration file, usually found at
/etc/nginx/nginx.conf, or in/etc/nginx/site-availablefor specific domains (recommended). - Find the
serverblock corresponding to the website domain. -
Add the location redirect. For example:
location = /ads.txt { return 301 https://cdn.tagdeliver.com/ciat/{your_pub_id}/ads.txt } -
Save the changes, then reload Nginx to apply them. You can do this with:
sudo systemctl reload nginx
Cloudflare
Cloudflare lets you set up URL redirections using Redirect Rules via the dashboard, API, or Terraform. We’ll go through setting up a single redirect in the dashboard.
- Log in to the Cloudflare dashboard and select your domain.
- Go to Rules > Redirect Rules
- Under Single Redirects, click on the Create rule button
- Enter a rule name (e.g., Ads.txt Redirect)
- For When incoming requests match, set the following:
- Field =
URI Path - Operator =
equals - Value =
/ads.txt
- Field =
- For Then..., configure:
- Type =
Static - Status code =
301. - URL =
https://cdn.tagdeliver.com/ciat/{your_pub_id}/ads.txt
- Type =
- Review your settings and click Save or Deploy to activate the redirect.
Note: Cloudflare dashboards may vary depending on your plan and might change over time.
cPanel
Using cPanel’s built-in redirect tool is a straightforward way to add redirect rules for your domain.
- Log in to cPanel and go to Domains > Redirects
- In the Add Redirect section, set the following:
- Type: Select
Permanent (301) - Domain: Choose your domain from the dropdown (
https?://(www.)?) - Path: Enter
/ads.txtin the field after the selected domain - Redirects to: Enter your hosted ads.txt URL:
https://cdn.tagdeliver.com/ciat/{your_pub_id}/ads.txt - Redirect with or without www: Choose whether this applies to just the
wwwversion, non-wwwversion, or both (recommended) - Wild Card Redirect: Leave
unchecked
- Type: Select
- Click Add to create the redirect
Warning
Redirects added through the cPanel interface are placed at the bottom of the .htaccess file. Some third-party applications might ignore these rules because they only read configurations within their section of the .htaccess file. In such cases, you may need to edit the .htaccess file directly or through the File Manager interface.
Conclusion
Each of the examples provided will set up a permanent 301 redirect for any request to https://yourdomain.com/ads.txt, pointing it to your hosted ads.txt file.
It’s a good idea to test the redirection after setting it up. Here are a couple of common methods to do this:
- In the browser: Visit
https://yourdomain.com/ads.txtand check if it redirects correctly. - Using a command-line tool: Run a command like
curl -I https://theirwebsite.com/ads.txtto ensure the status code is301and that it points to the right destination.
These examples are meant as a starting point for setting up redirects. Since server and domain configurations can be quite complex and vary widely, it’s always a good idea to consult your technical team for tailored advice and assistance with your specific setup.
Common Implementation Issues and Troubleshooting
-
Setting the Wrong Redirect Type
Make sure you set the redirect as a 301 (permanent). Using a 302 (temporary) redirect could confuse ad verification systems.
-
Single Redirects
According to the IAB Ads.txt 1.1 guidelines, only single redirects are allowed when redirecting to destinations outside of the original root domain. This means you should avoid any additional redirects to ensure one-hop delegation.
-
Case Sensitivity
Some web servers are case-sensitive. Double-check that your redirect points to
/ads.txt, not/Ads.txtor any other variation. -
Watch for Overrides
When setting up redirects at the domain level (e.g., Apache, Nginx), be cautious of other redirect rules that might override or conflict with yours. This can happen either at the same level or within server-level configuration files.
-
Multiple Sources
Only set up one redirect per domain. Having multiple redirects can cause issues with ad verification systems.
-
SSL/HTTP Issues
If your domain uses HTTPS, ensure the redirect points to the secure URL (e.g.,
https://cdn.tagdeliver.com/...). Also, confirm that the original domain uses HTTPS or set up an HTTP-to-HTTPS redirect. -
Caching
When using Cloudflare or other CDN services, don’t forget to purge the cache to apply your changes immediately.
Useful Redirection Resources
- How To Create Temporary and Permanent Redirects with Apache and Nginx by DigitalOcean
- Nginx Rewrite URL Rules Examples by DigitalOcean
- Creating Nginx Redirects by Runcloud
- Single Redirects by Cloudflare
- Redirects by cPanel
- IAB Ads.txt 1.1 by IAB